
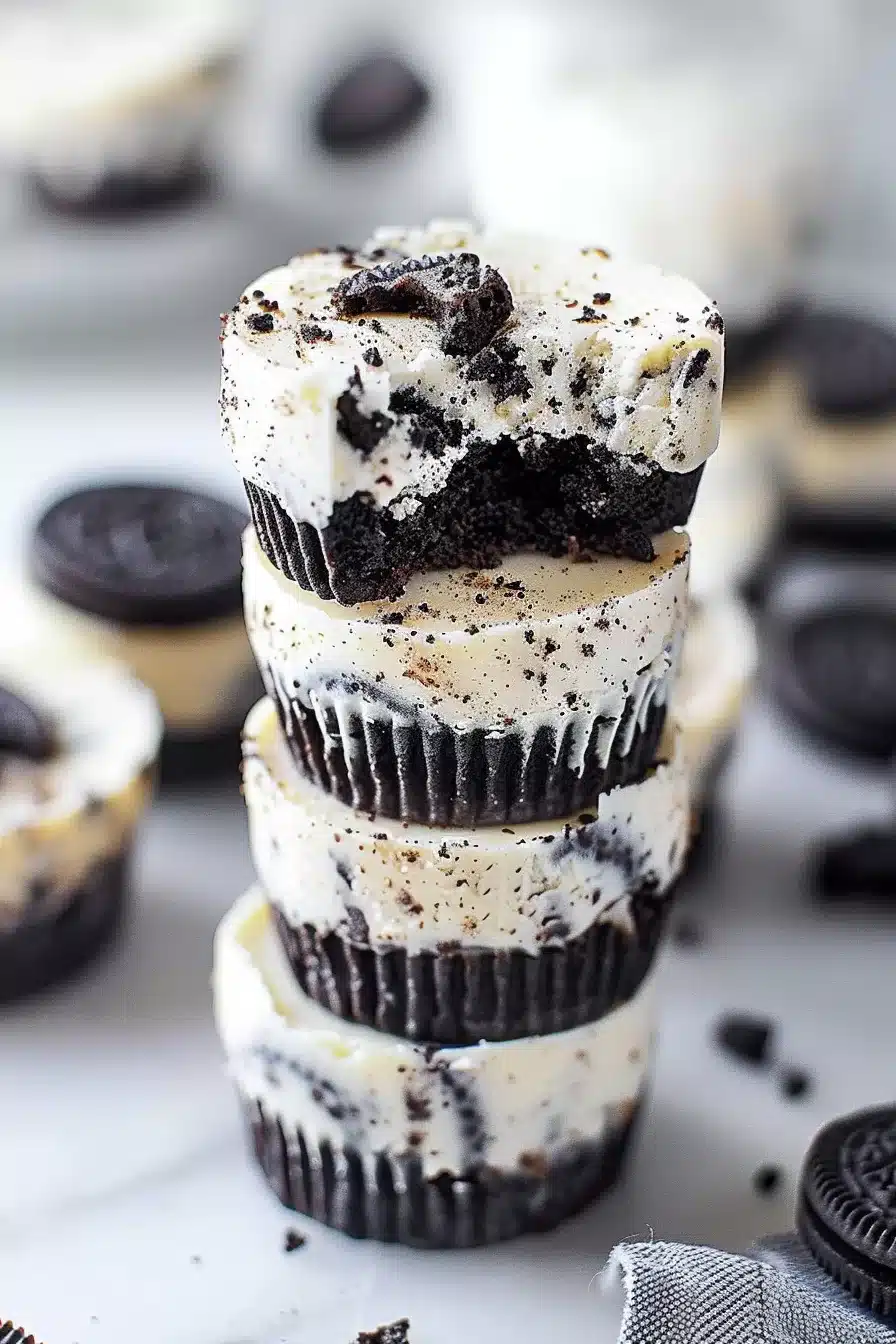
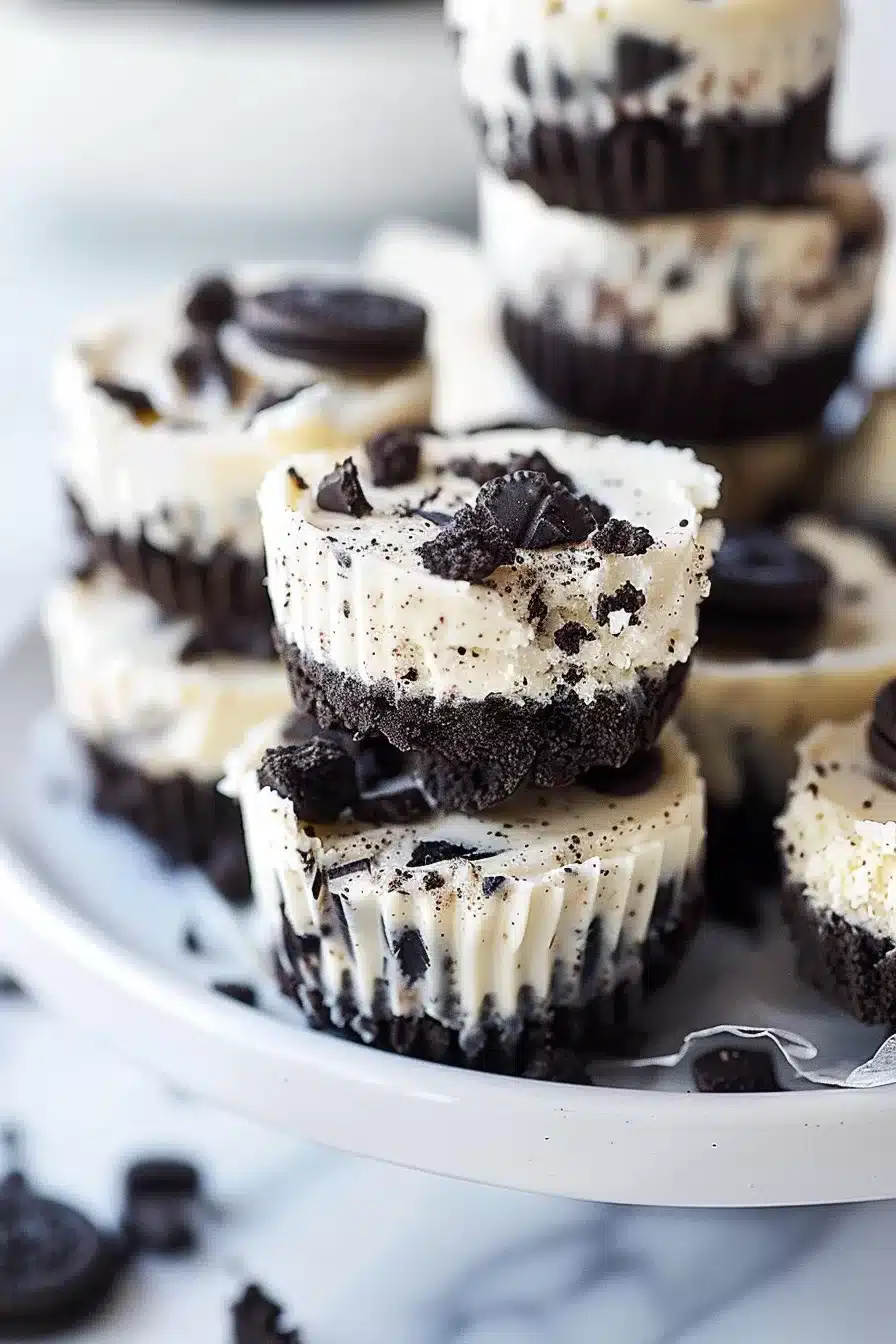
Creamy Oreo Crust Mini Cheesecake Bites made with light cream cheese, Greek yogurt, eggs, and vanilla, all sitting on a crunchy Oreo base. Perfect for any occasion!
You know how some desserts have the power to turn an ordinary day into something special? That’s exactly what these Oreo Crust Mini Cheesecake Bites did for me. The first time I made them, it was for my best friend’s birthday. I wanted to bring something homemade but not too fussy (because, honestly, life is busy), and these little bites came to the rescue.


The funniest part? I wasn’t sure how they’d turn out. I mean, Oreos as a crust? It felt almost too easy. But as soon as I saw everyone’s faces light up after the first bite, I knew I had stumbled onto something special. My friend even joked that I should skip the cake next year and just triple the batch of these.
Now, these cheesecakes have become my secret weapon for everything from potlucks to casual movie nights. They’re easy to make, fun to eat, and they always disappear way faster than I expect.
Why You’ll Love This Oreo Crust Mini Cheesecake Bites Recipe?
Here’s why these Oreo Crust Mini Cheesecake Bites are worth every second in the kitchen:
- Easy to Make: No fancy equipment or complicated steps.
- Perfect Portions: Bite-sized cheesecakes mean no messy slicing—just grab and go.
- Oreo Magic: That crunchy, chocolatey base adds the perfect texture.
- Customizable: Add toppings, swap the crust, or tweak the filling to make them your own.
- Guaranteed Crowd-Pleaser: Seriously, these are always the first to disappear.
Ingredient Notes:
Let’s talk about the stars of the show:
- Light Cream Cheese: It’s the creamy, dreamy base for the cheesecake filling. Using light cream cheese makes them feel just a touch lighter without sacrificing richness.
- Greek Yogurt or Sour Cream: Adds a subtle tang and helps keep the filling smooth.
- Sugar or Truvia: You can go classic with sugar or opt for Truvia if you’re looking to cut back on sweetness.
- Eggs: These bind everything together and give the cheesecakes their velvety texture.
- Vanilla Extract: Just a dash adds that comforting, sweet aroma.
- Oreo Cookies: The easiest crust ever—no crushing, no mixing. Just drop one into each muffin liner and let it work its magic.
Pro Tip: Use double-stuffed Oreos if you want a little extra creaminess in the crust. And if you’re feeling adventurous, try one of the seasonal Oreo flavors for a fun twist!
How To Make Oreo Crust Mini Cheesecake Bites?
Step 1. Preheat and Prep
First, set your oven to 325°F (163°C) and line a muffin tin with paper liners. Drop an Oreo cookie into the bottom of each liner—easy, right?
Step 2. Mix the Cheesecake Filling
In a mixing bowl, beat the cream cheese, Greek yogurt, and sugar (or Truvia) until the mixture is silky smooth. Add the vanilla and give it another quick mix. Then, crack in the eggs one at a time, mixing thoroughly after each one. The batter should be creamy, lump-free, and just begging to be baked.
Step 3. Assemble the Cheesecakes
Scoop the cheesecake batter onto each Oreo, filling the liners about three-quarters full. The batter will spread slightly as it bakes, so no need to overfill.
Step 4. Bake
Pop the muffin tin into the oven and bake for about 20 minutes. Keep an eye on them—they should set in the middle but not rise too much. If they do puff up, don’t worry; they’ll settle as they cool.
Step 5. Cool and Serve
Once they’re done baking, let them cool completely in the tin. This part is important—trust me, removing them while warm can get messy. When they’re cool, peel back the liners to reveal that perfectly smooth cheesecake on top of the Oreo crust.
Want To Save This Recipe?

Storage Options:
If you have any leftovers (good luck with that), here’s how to store them:
- Fridge: Store in an airtight container for up to 5 days. They’re best served chilled, straight from the fridge.
- Freezer: Wrap each cheesecake bite individually in plastic wrap and freeze them for up to 2 months. Thaw in the fridge overnight for a ready-to-eat treat.
Variations and Substitutions:
Want to get creative? Here are a few ideas to make these mini cheesecakes your own:
- Flavored Oreos: Try peppermint, peanut butter, or golden Oreos for a fun twist.
- Toppings: Add a drizzle of chocolate ganache, caramel, or a dollop of whipped cream.
- Mix-Ins: Swirl Nutella, raspberry jam, or peanut butter into the cheesecake batter before baking.
- Healthier Version: Use low-fat cream cheese and Greek yogurt for a lighter option.
What to Serve with Oreo Crust Mini Cheesecake Bites?
These bites are a hit on their own, but pairing them with something extra never hurts:
- Coffee or Espresso: The bitterness balances out the sweet, creamy cheesecake.
- Fresh Berries: Strawberries, raspberries, or blueberries add a refreshing contrast.
- Ice Cream: A scoop of vanilla or chocolate ice cream makes this dessert even more indulgent.
- Milkshakes: Go full Oreo overload and serve with an Oreo milkshake.
Frequently Asked Questions:
Can I make these ahead of time?
Absolutely! They’re even better when made a day in advance. Just keep them in the fridge until you’re ready to serve.
Do I have to use paper liners?
I highly recommend it! They make cleanup easy and keep the cheesecakes looking neat.
Can I use a different cookie for the crust?
Totally. Graham crackers, chocolate chip cookies, or even Biscoff cookies would all work beautifully.
These Oreo Crust Mini Cheesecake Bites aren’t just a dessert—they’re a little piece of happiness you can hold in your hand. Whether you’re making them for a party or just because, they’re guaranteed to be a hit. What do you think? Ready to try them out? Let me know how they turn out—and if you add your own twist, I’d love to hear all about it!
Keep the Flavor Coming – Try These:

Oreo Crust Mini Cheesecake Bites
Ingredients
- 16 oz. of Light cream cheese
- 5.3 oz. plain Greek yogurt or 5 oz. of sour cream
- ¼ c. Truvia or ½ c. regular sugar
- 2 eggs
- ½ teaspoon vanilla
- 12 Oreo cookies
Instructions
- Preheat your oven to 325°F (163°C).
- Put a paper liner in each muffin cup. Place an Oreo cookie at the bottom of each cup. (Check the notes section below for an Oreo crust variation!)
- In a mixing bowl combine the cream cheese, Greek yogurt and Truvia. Beat the mixture until it becomes smooth and well-blended.
- Add the vanilla. Mix again.
- One by one add the eggs. Thoroughly mix after each addition.
- Using either a cookie scoop or an ice cream scoop place one scoop of the cheesecake batter on top of each Oreo cookie.
- Put the muffin tin in your oven. Bake for about 20 minutes. Keep an eye, on them to make sure the cheesecakes don't rise much; gently press them down if necessary.
- Take out the cheesecakes from the oven. Let them cool completely.
- Gently remove the muffin liners to reveal the luscious chocolatey Oreo crust. Now is when you can truly enjoy these cheesecake bites!
Notes
- Crush 12 Oreo cookies to form fine crumbs.
- Mix crumbs with 2 tablespoons melted unsalted butter.
- Press about a tablespoon of this mixture into each muffin cup, forming a crust.
- Pour the cheesecake batter over this crust before baking.
I’m Bitty, owner of nodashofgluten.com, where I share simple, delicious recipes for all tastes, including gluten-free. Check out my “About Me” page for more info!

