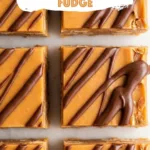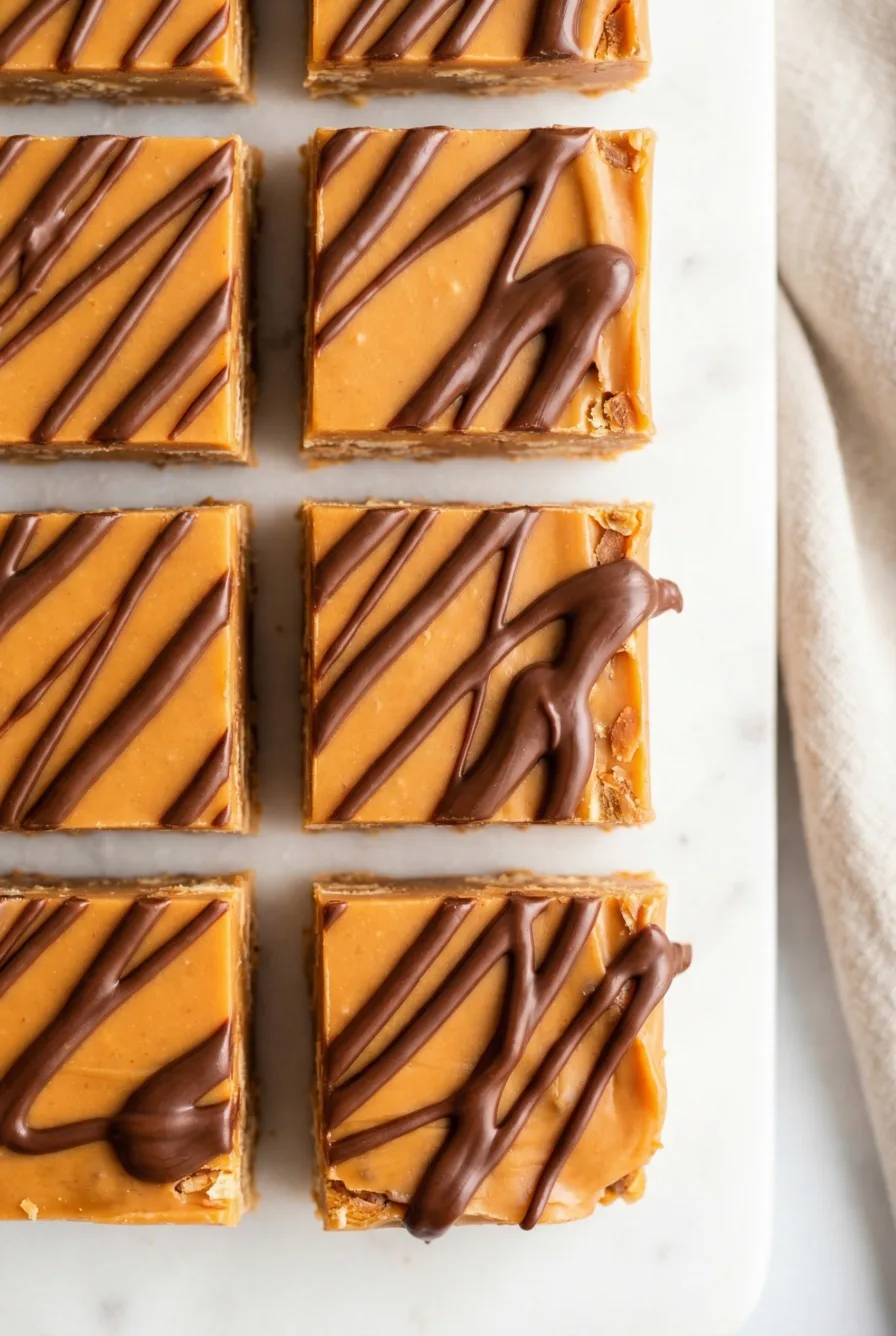
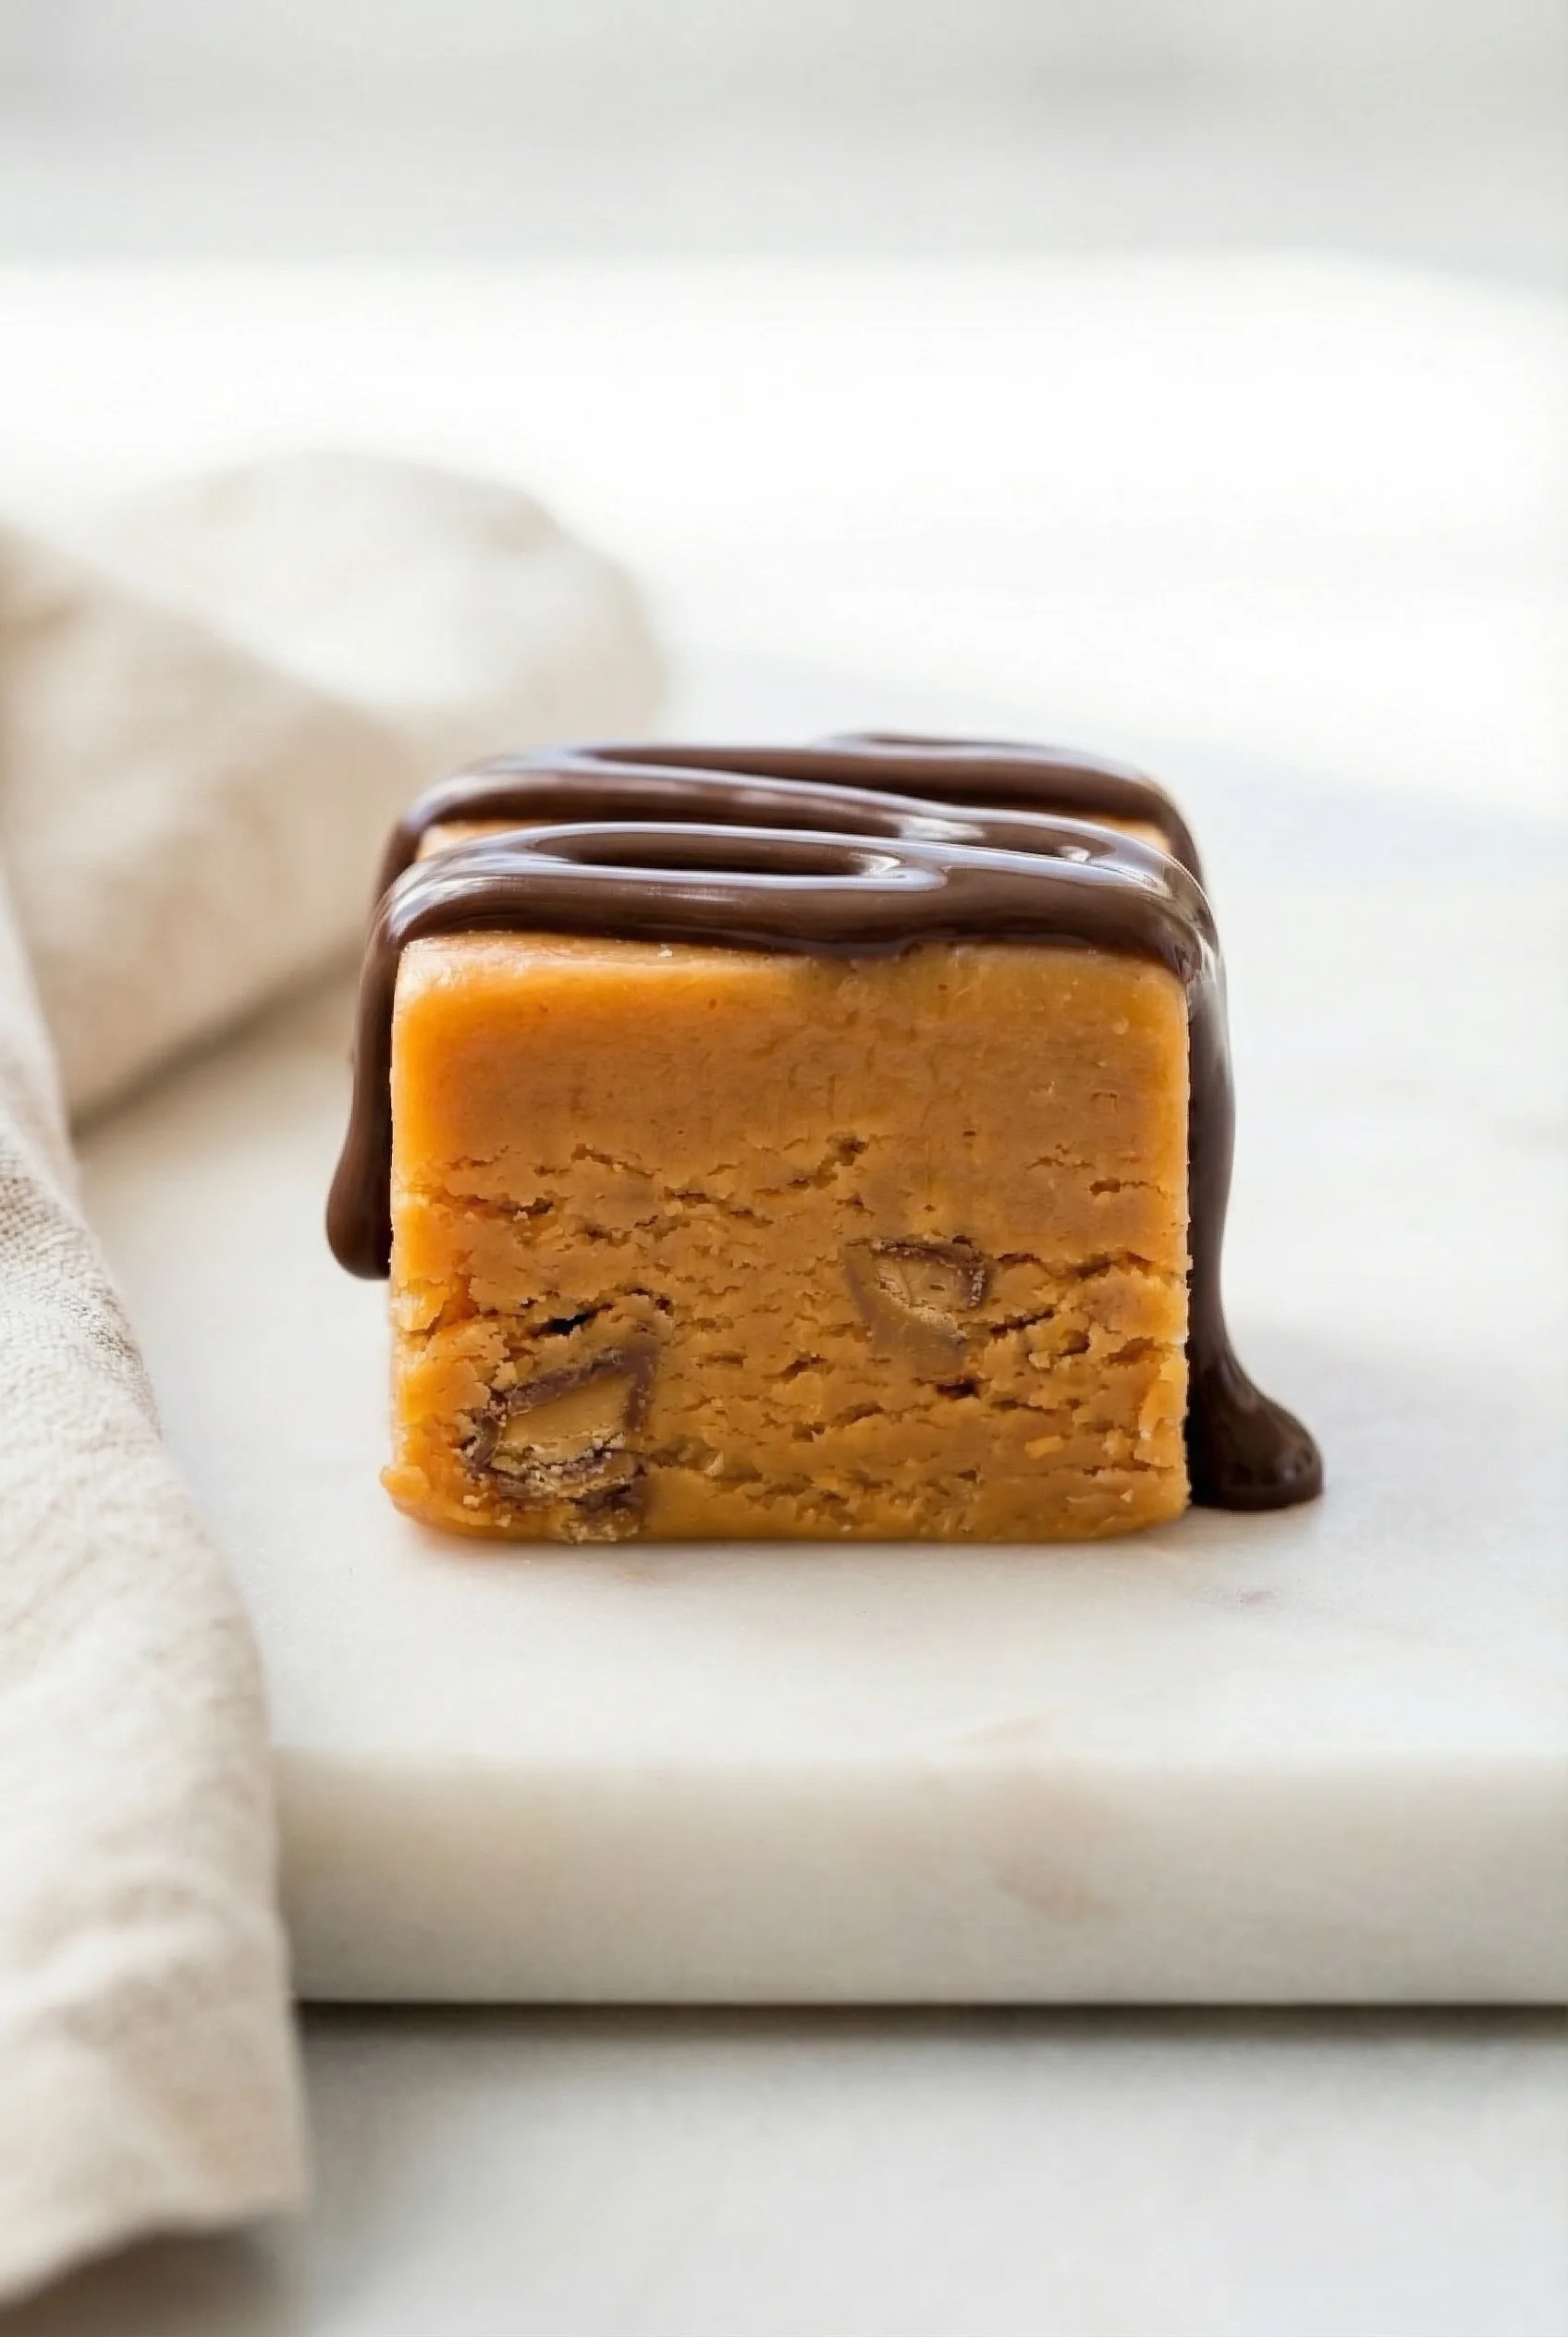
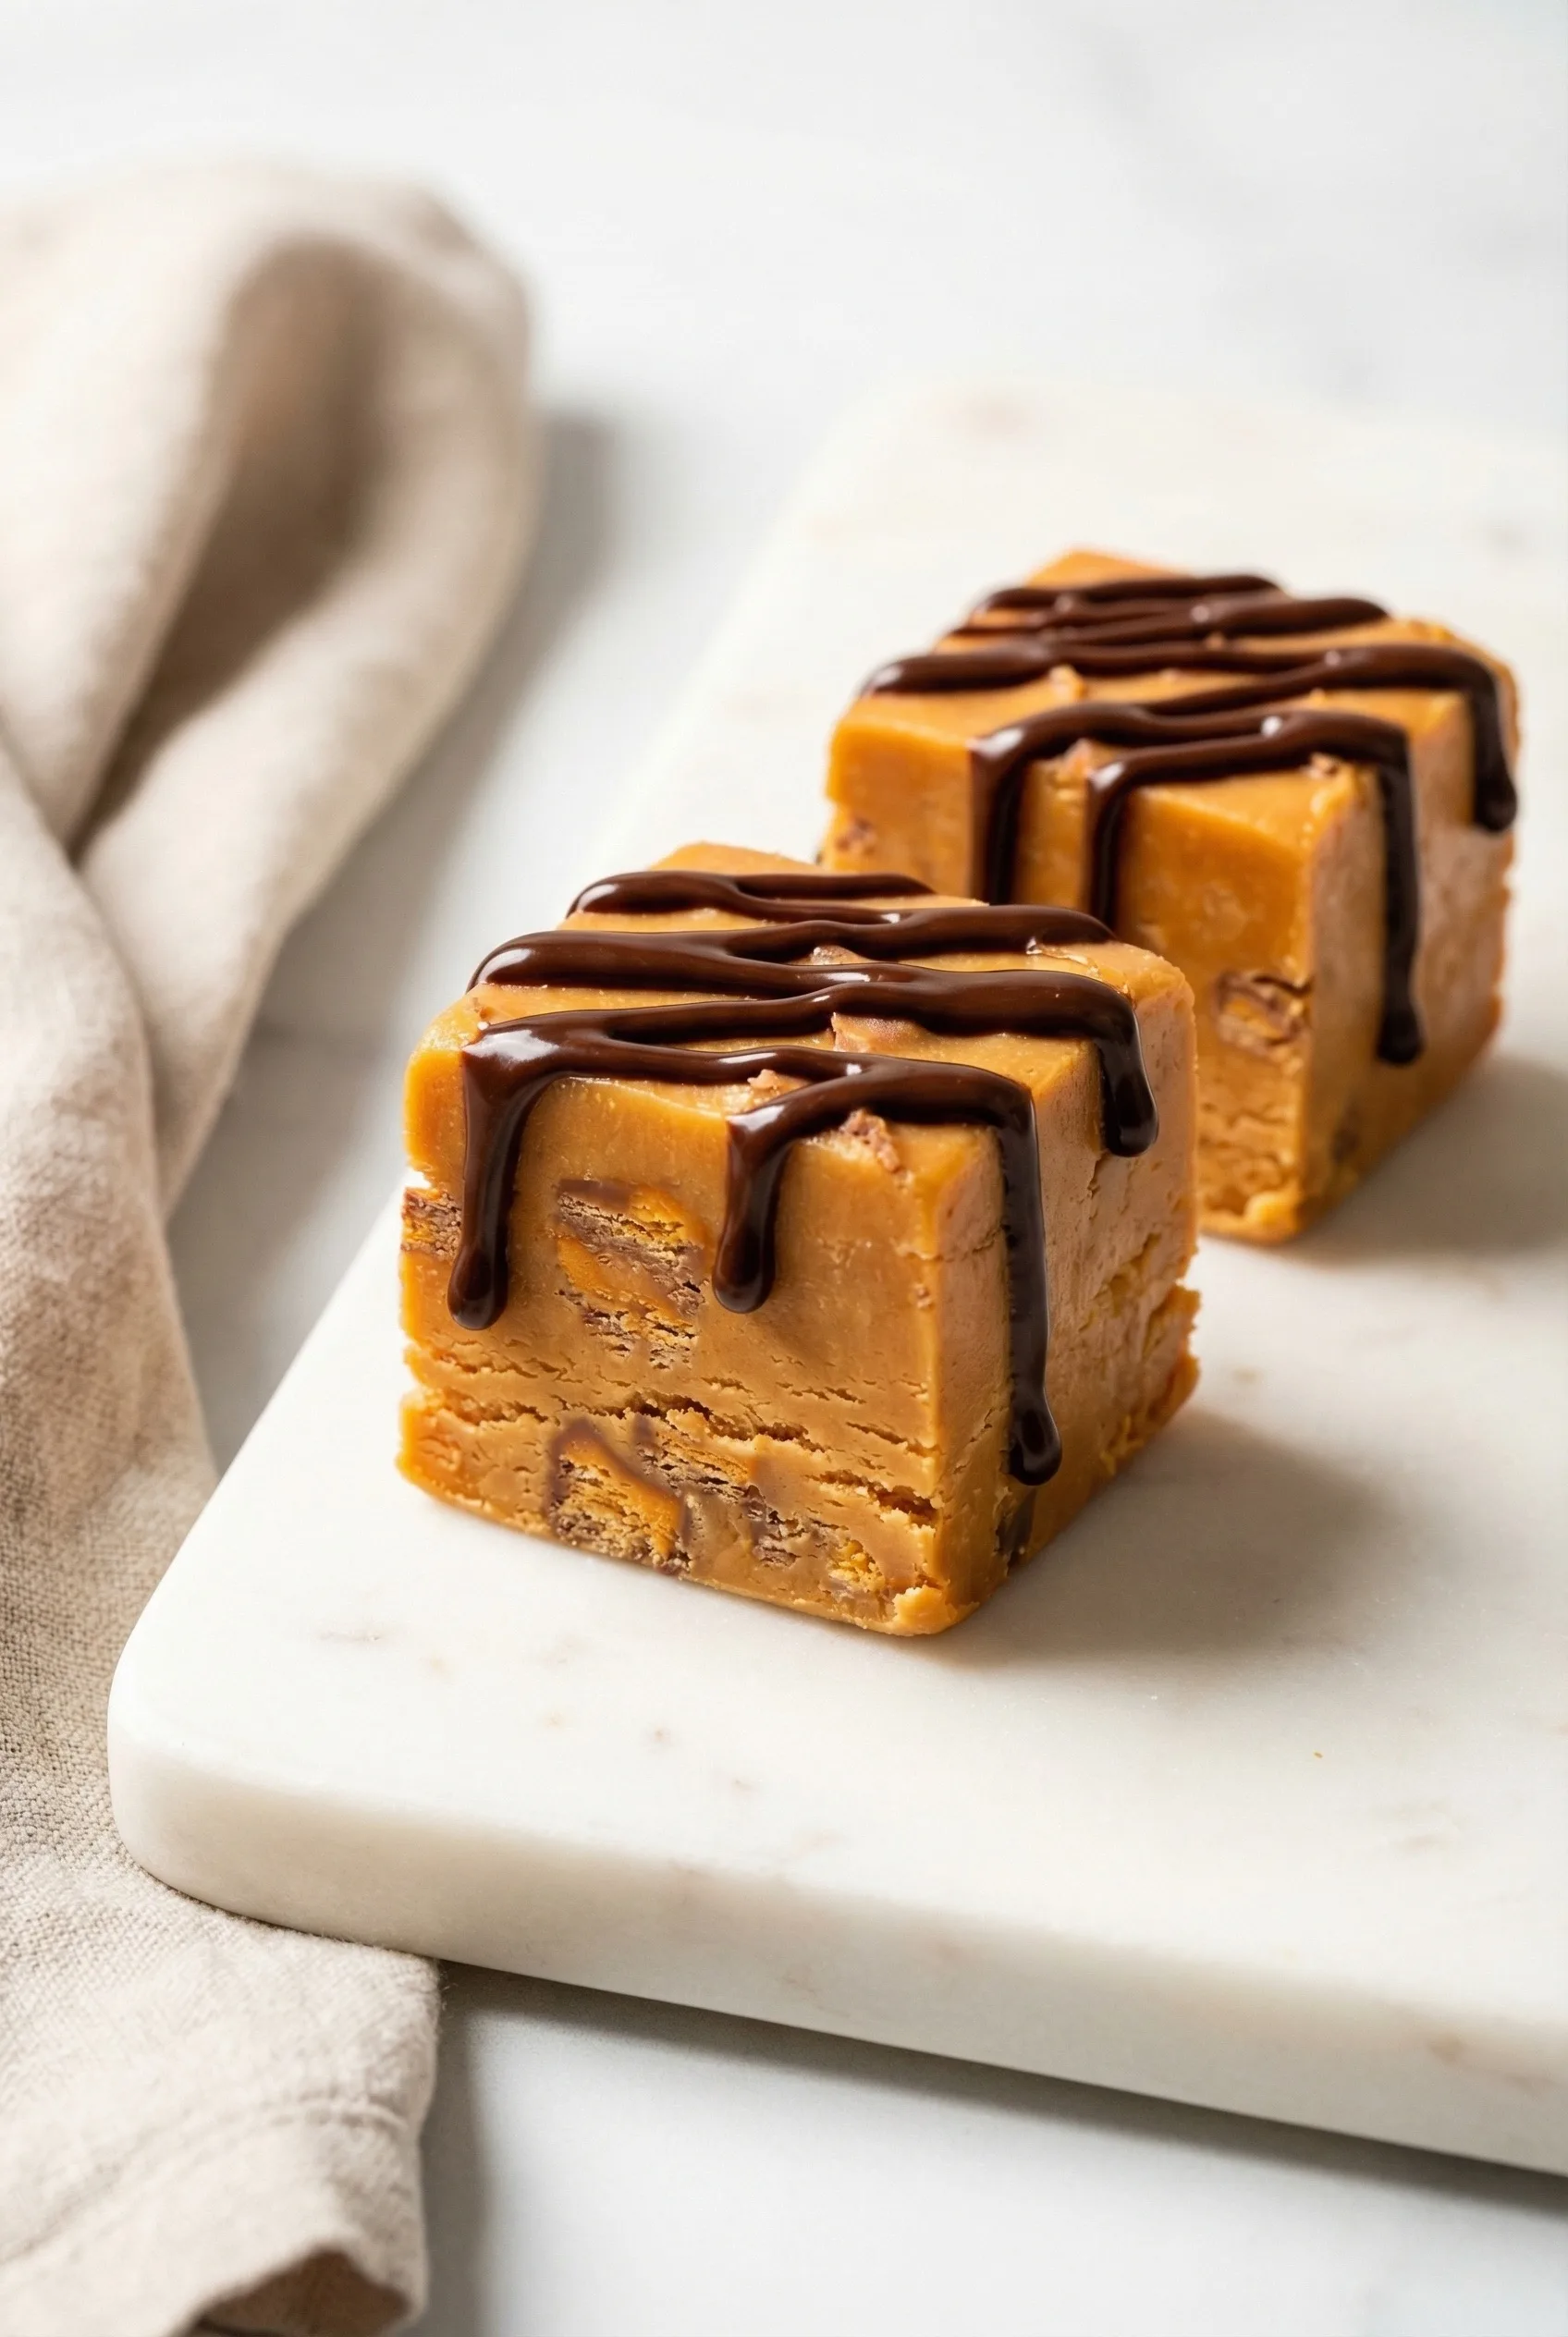
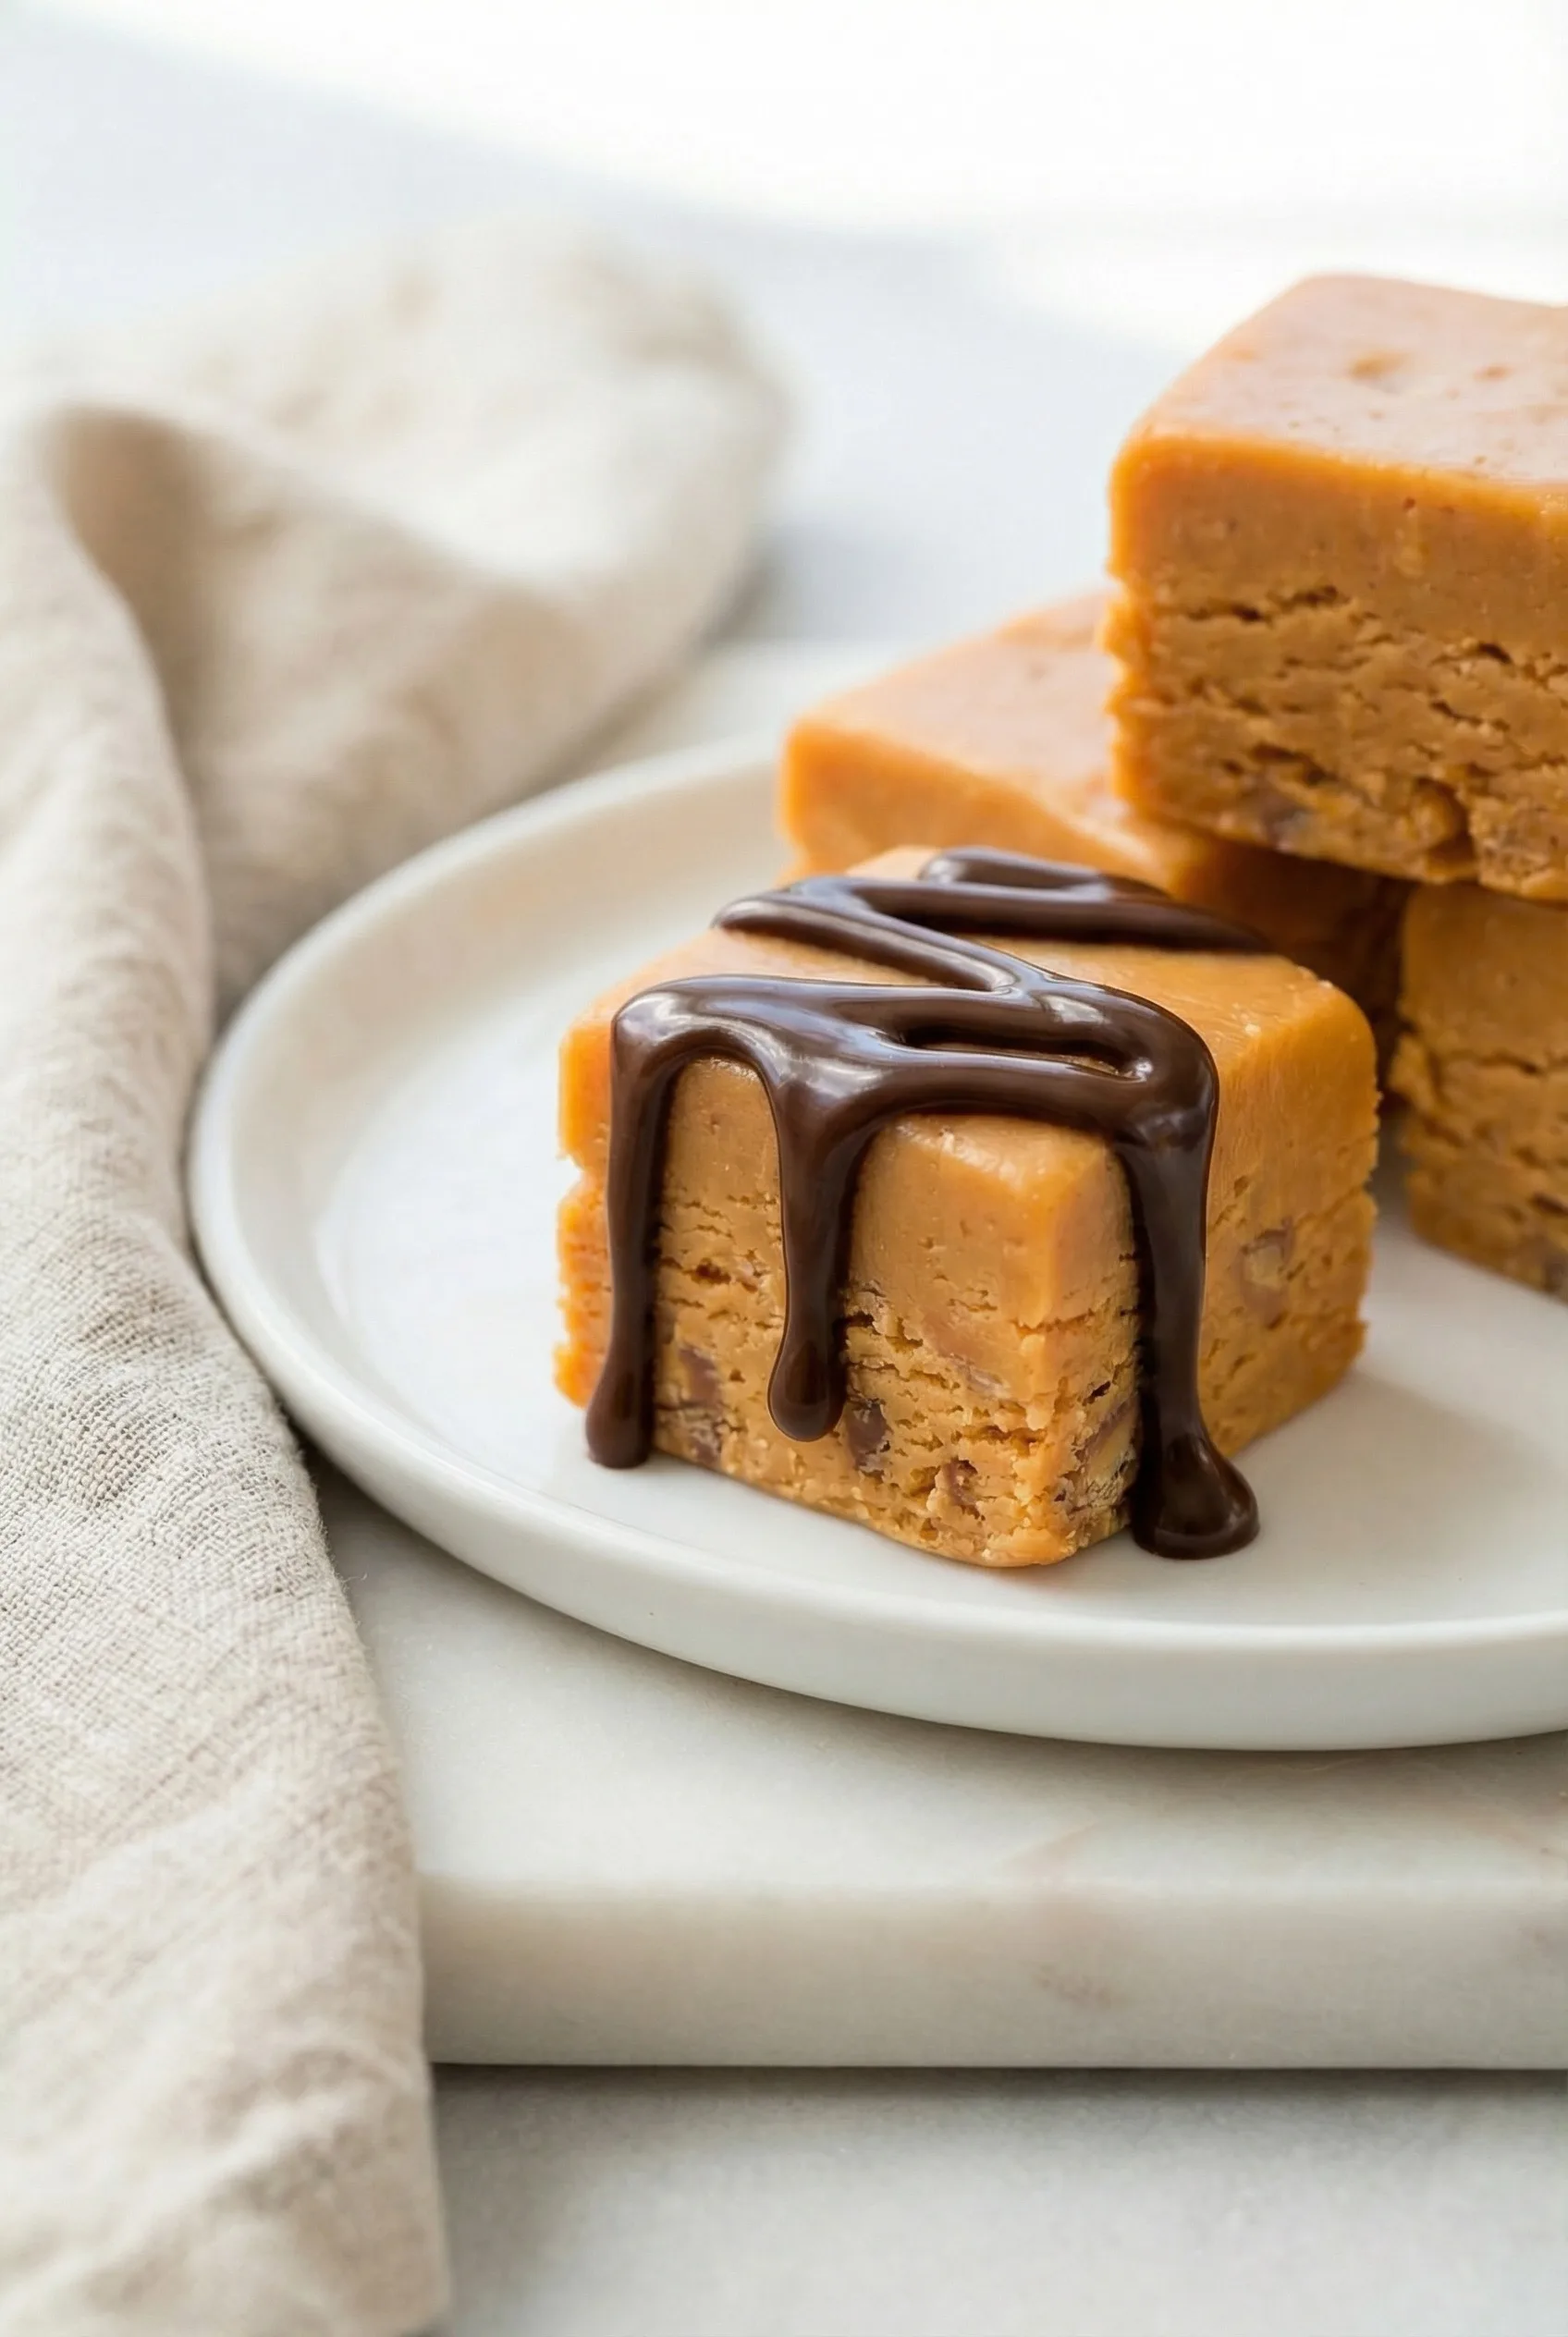
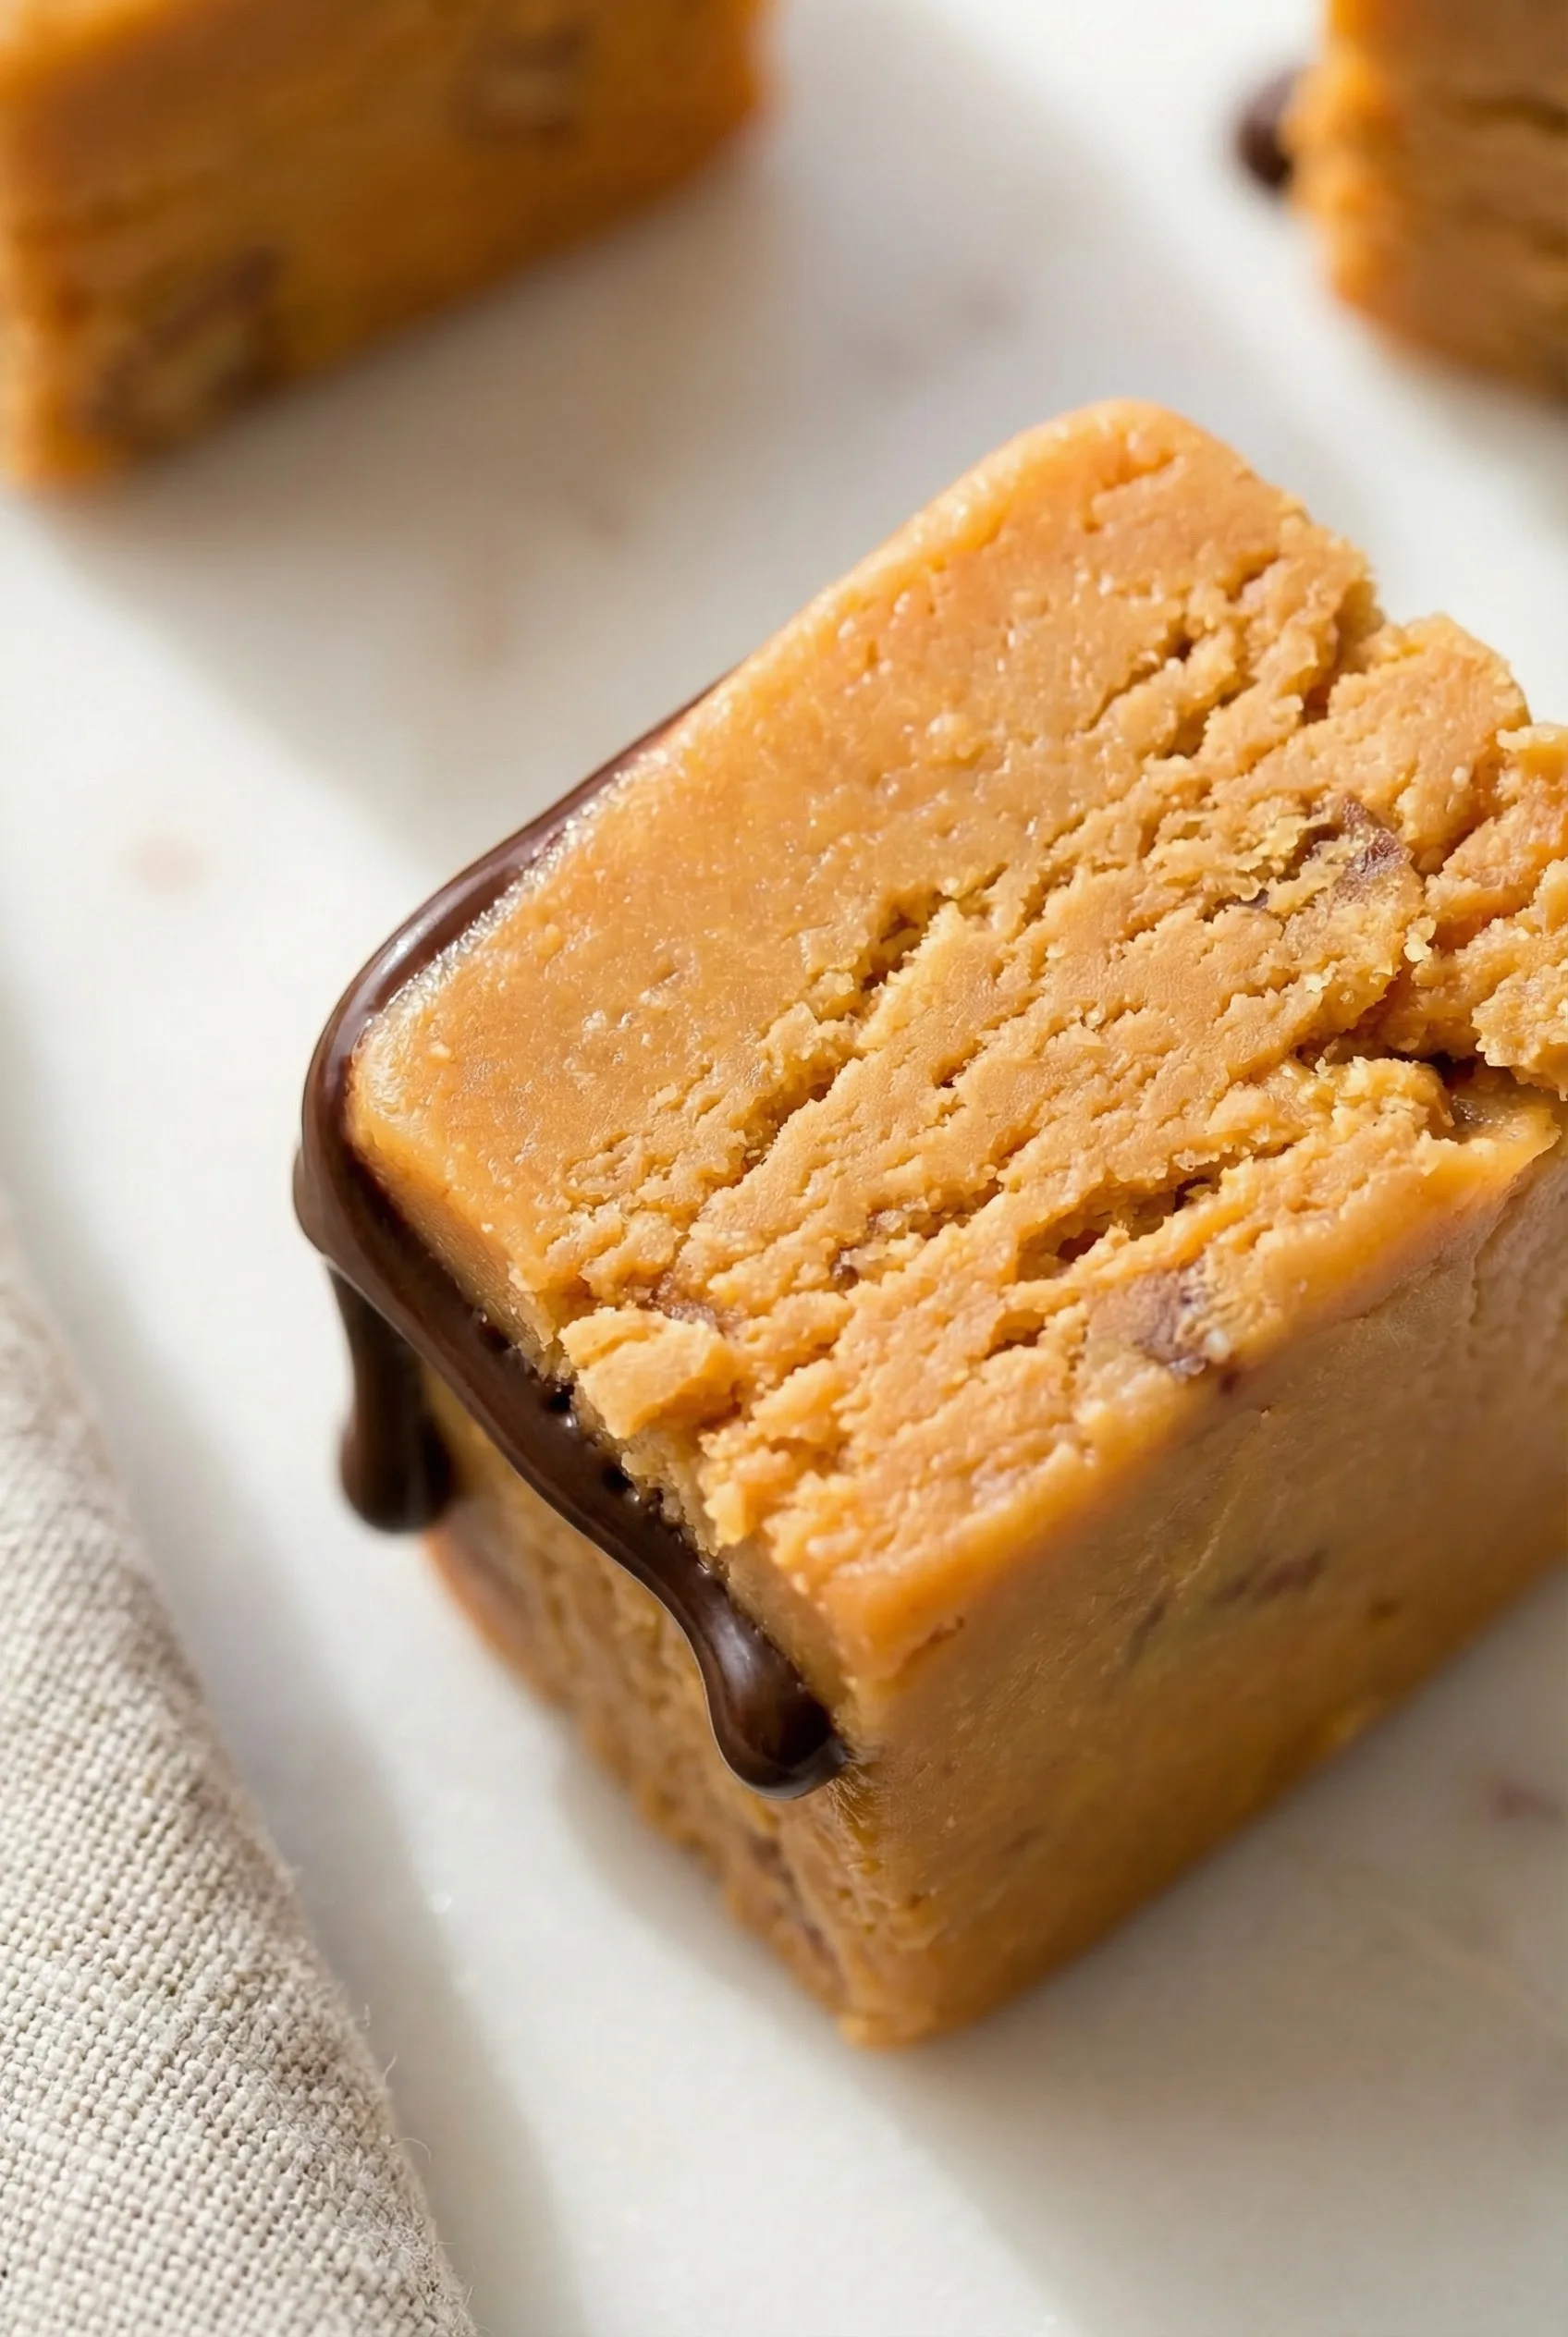
Chocolate Butterfinger Fudge made with candy corn, peanut butter, white chocolate, condensed milk, and chocolate drizzle.
I have this oddly vivid memory tied to Chocolate Butterfinger Fudge, and honestly I don’t know why it stuck with me the way it did. A couple years back—right after Halloween, when the weather was shifting in that weird in-between way where you’re wearing a sweater in the morning and regretting it by noon—I was cleaning out a kitchen drawer and found a stash of candy corn. Like… a lot of candy corn. It was almost embarrassing, the kind of thing you’d joke about on social media, except I didn’t post it because who admits they panic-bought four bags of candy corn??
Anyway, that same weekend I was visiting a friend in the next town over. She lives in this quieter neighborhood where all the houses have those cute porch swings and everyone waves like they actually know you. She’d mentioned she’d once made a “Butterfinger fudge” out of melted candy corn and peanut butter (I thought she was messing with me), and I remember thinking: there’s no way that works. But you know those moments where curiosity gets louder than logic? So I tried it. And this little pan of Chocolate Butterfinger Fudge honestly shocked me. It tasted like a candy bar decided to reinvent itself.


To this day, whenever I melt candy corn for this fudge, I get this weird swirl of nostalgia… like remembering the quiet drive home after visiting someone who makes you laugh in that easy, safe way. Maybe that’s dramatic, but I think food does that sometimes. Do you ever have a recipe that pulls up memories you didn’t even realize you’d saved?

Why You’ll Love This Chocolate Butterfinger Fudge Recipe?
What I love about this Chocolate Butterfinger Fudge is that it’s this sort of funny hybrid between “looks impressive enough for a fancy party” and “was actually made in ten minutes while wearing mismatched socks.” It’s the definition of low-effort, high-impact dessert. And the flavor? That subtle candy-bar chew mixed with creamy peanut butter fudge… it’s honestly so much better than it has any right to be.
It also has that classic American kitchen energy—like something you’d bring to a school bake sale where everyone pretends not to care but secretly hopes to take home leftovers. And even though I’m never totally sure how much candy corn will melt or how the fudge will settle (there’s always a tiny moment of “is this going to turn out right?”), that unpredictability kind of adds to its charm. Everything doesn’t need to be perfect. Sometimes it’s the slightly crooked dessert squares that people love the most.

Ingredient Notes:
Before we dive into actually making this peanut butter fudge / Butterfinger fudge creation, here’s why each ingredient matters. And if it sounds a little chaotic at times, well… same.
-
Candy Corn
I swear this is the strangest part of the recipe, but also the star. When candy corn melts, it becomes this thick, sticky, caramel-like base that mimics the flavor of a Butterfinger without you needing to actually crunch up candy bars. Wild but true. -
White Chocolate Chips
They bring smoothness. Think of them as the peacemaker in the pot—they calm everything down and turn chaos into something silky. -
Peanut Butter
You already know. It gives the Chocolate Butterfinger Fudge that candy-bar soul. The creamier the better. -
Sweetened Condensed Milk
Thick, sweet, comforting. The kind of ingredient that makes you feel like your grandma is standing over your shoulder insisting you add “just a little more.” -
Semi-sweet Chocolate Chips (optional)
For the drizzle, the flair, the edible confidence boost. -
Salt
Optional, but honestly? A little salt grounds the sweetness. Almost like the fudge taking a deep breath. -
Vegetable Oil
Helps the chocolate melt without throwing a tantrum.
How To Make Chocolate Butterfinger Fudge?
Let’s make this Chocolate Butterfinger Fudge. And if you spill something, or it gets a bit messy, or the mixture looks strange halfway through—welcome to cooking like the rest of us.
Step 1: Prep Your Dish
Line a 9×9 pan with parchment or foil. I never cut mine right, so it usually sticks up unevenly, but that’s fine. It’s not here for beauty. It’s here so your fudge doesn’t glue itself to the pan forever.
Step 2: Melt Candy Corn + Peanut Butter
Add your candy corn and peanut butter to a pot over medium-low heat. Stir, stir, stir. It’ll look wrong at first—like Halloween leftovers protesting—but trust the process. If it’s refusing to cooperate, go ahead and add the condensed milk sooner.
Step 3: Add the Sweetened Condensed Milk
Once the candy corn softens a little, add the condensed milk. This is when everything suddenly starts making sense. Warm, melty, glossy. And hey, try not to eat it straight from the spoon even though the temptation is very real.
Step 4: Bring in the White Chocolate
Let the mixture simmer gently (nothing wild), then stir in the white chocolate chips until smooth. Add salt if you feel like it.
Step 5: Spread and Set
Pour the mixture into the lined dish. Spread it out. Mine always ends up a little lumpy in the corners, and honestly I don’t fight it anymore.
Step 6: Chill It
Cool for 15 minutes on the counter, then into the fridge until firm. A few hours should do it, or overnight if you forget it’s there and go to bed (happens to me constantly).
Want To Save This Recipe?
Step 7: Optional Chocolate Drizzle
Melt chocolate chips with a splash of oil in the microwave. Stir, repeat, pray it doesn’t burn. Then drizzle or pipe over the fudge like you’re auditioning for a baking show even though you’re absolutely not.
Step 8: Slice + Eat
Cut into squares and enjoy. I always tell myself I’ll just have one piece, and then somehow two more disappear. No idea how.
Storage Options:
This Butterfinger fudge holds up really well in the fridge—about a week, maybe a bit longer if you hide it behind the vegetables where nobody looks. At room temp it lasts around three days, though the texture softens (not bad, just different). And yes, you can totally freeze it. Wrap the pieces individually and thaw them in the fridge so they stay creamy instead of crumbly.
Variations and Substitutions:
Because recipes should bend a little to your mood:
-
Want extra crunch? Add chopped Butterfinger bars.
-
Not a candy corn fan? (Valid.) Swap some for marshmallows — it changes the flavor a bit but still delicious.
-
Add pretzels for salty-sweet vibes.
-
Drizzle dark chocolate for a richer version.
-
Add vanilla or maple extract if you’re feeling cozy.
Honestly, Chocolate Butterfinger Fudge forgives mistakes. It forgives experimentation. It’s the kind of recipe that just wants you to have fun.
What to Serve with Chocolate Butterfinger Fudge?
This fudge pairs well with just about anything, but here are my favorites:
-
Strong coffee — the bitterness balances the sweetness beautifully.
-
Vanilla ice cream — warm fudge + cold ice cream = universal happiness.
-
Salted nuts or pretzels — trust me.
-
Hot cocoa in winter — it feels extra nostalgic.
Frequently Asked Questions:
Why won’t my candy corn melt?
Probably the heat. Candy corn is dramatic and melts best with some moisture, so the condensed milk helps.
Does it actually taste like Butterfinger?
It’s shockingly close. Like, weirdly close. You’ll see.
Can I double the recipe?
Absolutely. Just use a bigger pan and chill longer.

And that, my friend, is the whole messy, magical adventure of making Chocolate Butterfinger Fudge. I genuinely hope you try it—because there’s something fun about creating a dessert that feels nostalgic, quirky, and kind of brilliant all at once. If you do make it, tell me how it went… I love hearing kitchen stories, especially the slightly chaotic ones.
Keep the Flavor Coming – Try These:

Chocolate Butterfinger Fudge
Ingredients
- 3 cups candy corn
- 2 cups white chocolate chips
- 1 cup creamy peanut butter
- 1 14-ounce can sweetened condensed milk
- 1 cup semi-sweet chocolate chips optional
- ¼ teaspoon salt optional
- 1 –3 teaspoons vegetable oil optional, for melting chocolate
Instructions
Prepare the Baking Dish
- Line a 9×9-inch baking dish with parchment paper or aluminum foil, ensuring the surface is fully covered. Set aside.
Melt the Candy Corn and Peanut Butter
- In a large saucepan set over medium-low heat, combine the candy corn and peanut butter. Cook for 2–3 minutes, stirring frequently. If the mixture does not begin melting, add the sweetened condensed milk earlier than directed to prevent scorching.
Add Sweetened Condensed Milk
- Once the candy corn begins to soften, add the sweetened condensed milk. Continue cooking, stirring constantly, until the mixture becomes smooth and fully melted.
Incorporate the White Chocolate Chips
- Bring the mixture to a gentle simmer, then add the white chocolate chips. Stir continuously until fully melted and smooth. If using salt, stir it in at this stage.
Transfer to the Baking Dish
- Remove the saucepan from the heat. Carefully pour the mixture into the prepared baking dish, smoothing the surface into an even layer with a spatula.
Cool and Refrigerate
- Allow the fudge to cool at room temperature for approximately 15 minutes. Transfer to the refrigerator and chill until fully set.
Optional Chocolate Drizzle
- If desired, melt 1 cup semi-sweet chocolate chips with 1 teaspoon vegetable oil in the microwave in 20-second increments, stirring after each interval until smooth. Allow the chocolate to cool slightly, then transfer it to a resealable plastic bag. Snip a small section from one corner and pipe the chocolate over the chilled fudge. Return to the refrigerator to set.
Slice and Serve
- Once firm, cut the fudge into squares and serve. Store remaining portions in an airtight container.
Notes
I’m Bitty, owner of nodashofgluten.com, where I share simple, delicious recipes for all tastes, including gluten-free. Check out my “About Me” page for more info!